Getting Started
Prerequisites
Before installing mini-a, make sure you have:
- OpenAF installed on your system (see openaf.io for installation instructions)
- An API key for at least one LLM provider (OpenAI, Google, Anthropic, etc.) — or a local model via Ollama
Installation
-
Install OpenAF if you haven’t already:
# See https://openaf.io for full installation options curl -sSL https://openaf.io/install.sh | sh -
Install the mini-a opack:
opack install mini-a -
Optional: add a shell alias (
mini-a):# Bash echo 'alias mini-a="opack exec mini-a"' >> ~/.bashrc && . ~/.bashrc # Zsh echo 'alias mini-a="opack exec mini-a"' >> ~/.zshrc && . ~/.zshrc # sh echo 'alias mini-a="opack exec mini-a"' >> ~/.profile && . ~/.profileIf you don’t want to set an alias, use
opack exec mini-a [...]directly. -
Verify the installation:
mini-a -hYou should see the mini-a help output listing all available options and parameters.
Model Configuration
mini-a supports multiple LLM providers. Set OAF_MODEL using SLON/JSON-style configuration (and use provider key env vars only if you prefer not to embed keys in OAF_MODEL):
| Provider | Model variable | API key variable (optional) |
|---|---|---|
| OpenAI | OAF_MODEL="(type: openai, model: gpt-5.2, key: '...')" |
Optional (only if key not in model config) |
OAF_MODEL="(type: gemini, model: gemini-2.0-flash, key: '...')" |
Optional (only if key not in model config) |
|
| Anthropic | OAF_MODEL="(type: anthropic, model: claude-sonnet-4-20250514, key: '...')" |
Optional (only if key not in model config) |
| Ollama | OAF_MODEL="(type: ollama, model: 'llama3', url: 'http://localhost:11434')" |
No key needed (local) |
| Bedrock | OAF_MODEL="(type: bedrock, options: (region: eu-west-1, model: 'anthropic.claude-sonnet-4-20250514-v1:0'))" |
Uses AWS credentials |
| GitHub | OAF_MODEL="(type: openai, url: 'https://models.github.ai/inference', model: openai/gpt-5, key: $(gh auth token), apiVersion: '')" |
Optional (only if key not in model config) |
Example configuration:
export OAF_MODEL="(type: openai, model: gpt-5-mini, key: '...')"
# Optional low-cost routing/planning model
export OAF_LC_MODEL="(type: openai, model: gpt-5-nano, key: '...')"
# Optional dedicated validation model for deep research mode
export OAF_VAL_MODEL="(type: openai, model: gpt-5-mini, key: '...')"
If you need the validation override only for one run or one oJob step, use:
modelval=...to overrideOAF_VAL_MODELat runtime with the same SLON/JSON model syntax.vmodel=...in deep-research jobs when you want the validation model override to stay local to that run or pipeline step.
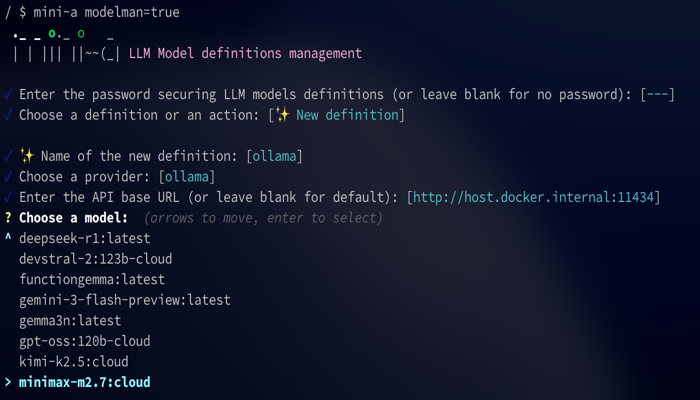
If you prefer not to keep raw model definitions in shell profile files, launch the interactive model manager:
mini-a modelman=true
Model Manager
mini-a includes a built-in TUI (text user interface) for managing models interactively:
mini-a modelman=true
Your First Run
mini-a offers three ways to interact with it:
Console (Interactive)
Launch mini-a in interactive console mode and enter goals conversationally:
mini-a
Once started, type your goal at the prompt and press Enter. mini-a will plan and execute steps to achieve it.
Direct Goal
Pass a goal directly from the command line for non-interactive execution:
mini-a goal='List all files in the current directory'
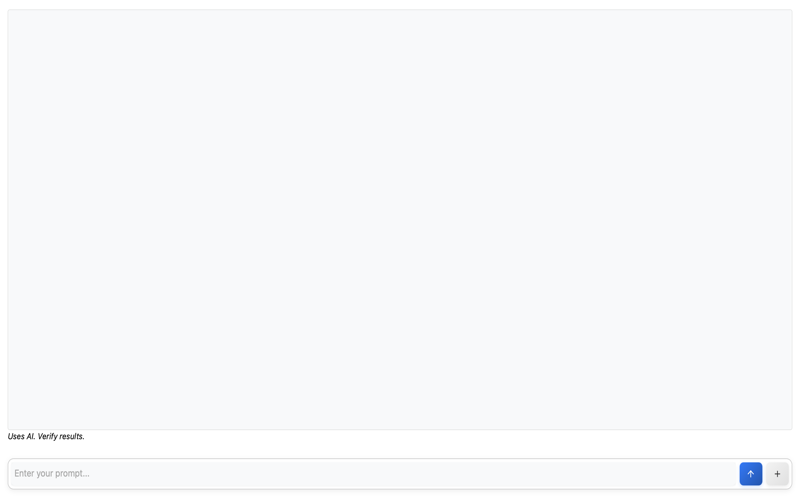
Web UI
Start mini-a with the web interface and open it in your browser:
mini-a onport=8080
Then open http://localhost:8080 in your browser.
For live token-by-token updates in the browser, enable streaming:
mini-a onport=8080 usestream=true
usestream=true uses SSE to push output progressively to the page. If you need XML-tagged <thinking>...</thinking> blocks surfaced as thought logs, use showthinking=true instead of streaming for that run.
Docker Quick Start
You can run mini-a directly with Docker without installing OpenAF:
docker run -e OAF_MODEL="(type: openai, model: gpt-5-mini, key: '...')" -p 8080:8080 openaf/mini-a onport=8080
This starts the web UI on port 8080. Open http://localhost:8080 in your browser to get started.
Console Commands
When running in interactive console mode, the following commands are available:
| Command | Description |
|---|---|
/help |
Show available commands |
/model [target] |
Show current model, or inspect/change model, modellc, or modelval |
/show [prefix] |
Show active parameters, optionally filtered by prefix |
/skills [prefix] |
List discovered skills, optionally filtered by prefix |
/compact [n] |
Compact older history while keeping up to the latest n exchanges (default 6) |
/summarize [n] |
Replace older history with a narrative summary and keep up to the latest n exchanges (default 6) |
/context |
Show token/context breakdown |
/reset |
Reset conversation |
/exit |
Exit mini-a |
/last [md] |
Reprint the last final answer (md prints raw markdown) |
/save <path> |
Save the last final answer to a file |
/clear |
Reset conversation history and accumulated metrics |
/cls |
Clear screen |
/stats [mode] [out=file.json] |
Show usage metrics (summary, detailed, tools) |
File Inclusion
You can include file contents directly in your prompt using the @ syntax. Prefix any filename with @ to inject its contents into the prompt:
mini-a useutils=true goal='@README.md Summarize this project'
This reads the contents of README.md and sends it along with your instruction to the LLM. You can reference any accessible file path.
Mode Presets
mini-a provides reusable mode presets that quickly configure related flags.
Built-ins come from mini-a-modes.yaml, and you can extend/override them with ~/.openaf-mini-a_modes.yaml (custom modes win over built-ins).
| Mode | What it enables |
|---|---|
shell |
Read-only shell access (useshell=true) |
shellrw |
Shell + write access + shell pipes/batch approvals preset |
utils |
Mini Utils Tool (useutils=true mini-a-docs=true usetools=true) |
chatbot |
Chatbot mode (chatbotmode=true) |
internet |
Internet-focused MCP/tool mode with docs-aware utils |
news |
Web + RSS news-focused MCP mode |
poweruser |
Shell + utils + tools + proxy tuning preset |
web |
Browser UI preset with MCP tools enabled |
webfull |
Full web UI preset with history, attachments, charts/diagrams, proxying, and richer rendering options |
Built-in mode example:
mini-a mode=shellrw goal='Create and run a quick script in the current folder'
Custom mode example (~/.openaf-mini-a_modes.yaml):
modes:
  mypreset:
    useshell: true
    readwrite: true
    maxsteps: 30
    knowledge: "Always use concise responses"
mini-a mode=mypreset goal='your goal here'
Common Issues
“Model not found” Check that your environment variables are set correctly. Verify the model name matches the provider’s naming convention and that your API key is valid.
“Permission denied” Shell access is disabled by default for security. Enable it explicitly:
mini-a useshell=true
“Context too long”
The conversation has exceeded the model’s context window. Use the /compact command to reduce context size, or set a maximum context limit:
mini-a maxcontext=4096
Connection errors Verify your API endpoint is reachable and your network connection is active. For Ollama, ensure the local server is running. For cloud providers, check that your API key has not expired.
Cheatsheet
Need a quick reference? The Cheatsheet has everything on one page: installation, model setup, console commands, key parameters, mode presets, and common MCP servers. Bookmark it for daily use.
Next Steps
Now that you have mini-a up and running, explore more of what it can do:
- Features — Discover all of mini-a’s capabilities, including agent files, multi-agent delegation, and working memory
- Examples — See real-world usage examples
- Configuration — Full parameter reference, channels, and advanced topics